

How To Set Up A Sway Bar
When my friend Michael opted to buy the more luxury oriented 2005 Legacy GT Limited rather than the sportier Impreza STI, he lost out on some of the crisp intermission that comes on the rally inspired model. That'due south why he contacted Cobb Tuning.
Cobb Tuning has specialized in Subaru Performance parts and tuning since before Subaru even brought over its Turbocharged Impreza WRX model from Nippon. With years of experience fine-tuning the required upgrades to reduce body roll and subtract understeer that plagues many mill cars, their tubular anti-sway bar kit not only enhances handling merely also is lighter than its stock counterparts.
Stabilizer bars, anti-sway bars or anti-roll bars, no matter what they're chosen, serve to go on the machine flatter in a corner to improve traction. Torso gyre is bad. Information technology tends to load up the exterior tires of a vehicle, reducing traction and messing upwardly steering. The anti-sway bar makes the interruption less independent. Sharing the interruption load from the exterior tires, the sway bar transfers weight to the inside tires, which means improve traction. When the sway bar is too rigid it transfers bumps on the road from one side to the other. This negates as well much of the independence of the interruption for both traction and comfort. So a well tuned bar tries to find a remainder for "real world" road conditions.
Michael took an extended route trip correct subsequently the install, but his initial study indicated improved handling, flatter cornering and less push button in the corners. And since he's putting on the miles across the Southwest, nosotros're guessing he'due south glad it'due south in his modded Legacy.
Cobb'due south forepart and rear anti-sway bars come up equally a complete kit, including upgraded rear mounts, bushings, bushing straps with zerk fittings, other hardware and grease.
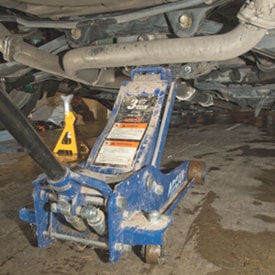
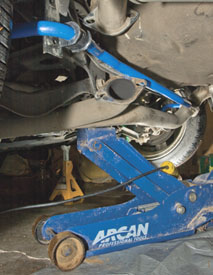
If you're not blessed with a store equipped with a lift, you can use a floor jack and jack stands to support the vehicle (check your vehicle's owner's manual for proper locations).

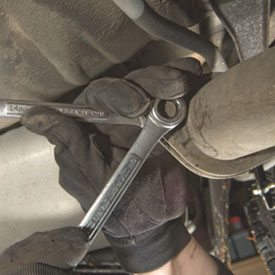
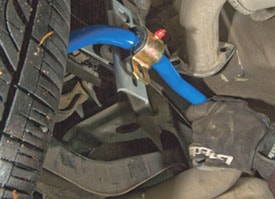
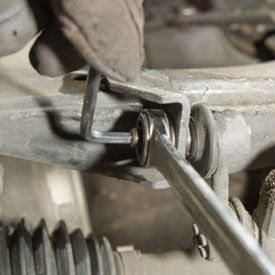
Tackling the rear bar first, we began by removing the rear sway bar endlinks. This takes ii 14-millimeter wrenches—ane to loosen the nut and the other in between the sway bay and endlink to keep the stud from spinning.
While you take the wrenches handy, remove the two bolts securing the driver'south side muffler to the Y-pipe. Permit the muffler to swing upwards out of the manner.
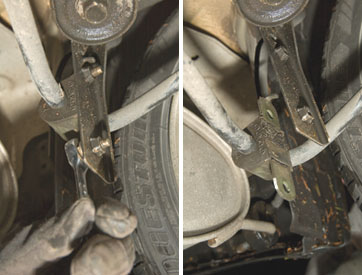
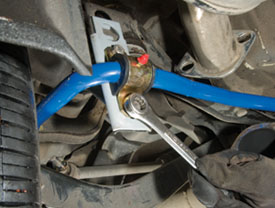
Left: Using a 12-millimeter ratchet, remove the bolts holding the stock sway bar bushing straps (two on each side).
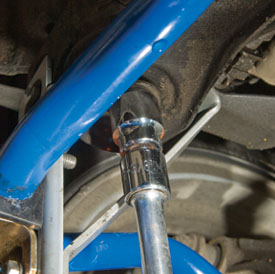
Correct: Note the orientation of the sway bar while removing the bushings. Keep track of the bushings so you can mimic their location on the new Cobb sway bar.
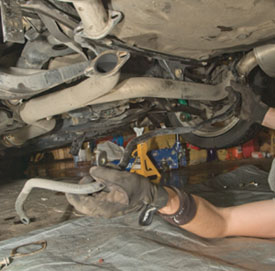
Serpent the sway bar effectually the exhaust on the passenger side, taking advantage of the extra room on the driver's side yous freed by moving the muffler before.
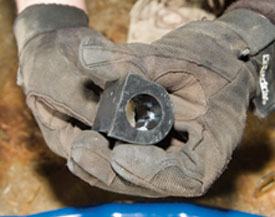
Liberally apply the supplied grease to lubricate the new, stiffer bushings (brand sure to apply the smaller 7/eight-inch bore bushings for the rear). Future lubrication using non-lithium grease can be applied using the zerk fittings.
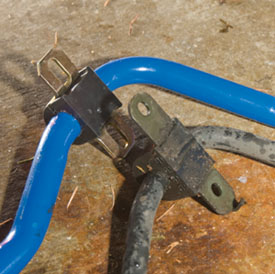
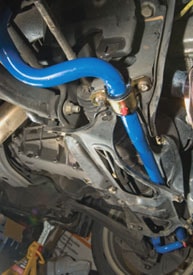
The tubular design of the Cobb anti-sway bars allows their larger aftermarket confined to still exist lighter weight. Annotation the similarly placed bushings.
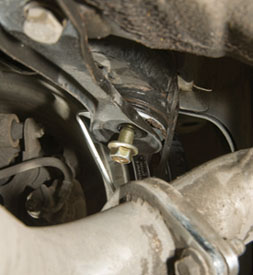
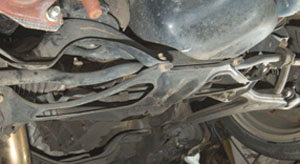
Supporting the rear differential housing, remove the nineteen-millimeter bolts from the sub-frame and slide the (left and correct specific) Cobb reinforcement brackets between the sub-frame and chassis.

Leaving the 19-millimeter loose, the brackets should line upwards with the stock holes. The reinforced brackets help handle the extra forces the larger sway bar applies to the suspension.
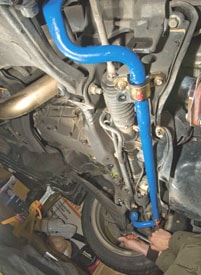
Slide the Cobb sway bar into position, keeping the angles needed with the stock sway bar in mind. The aftermarket cat-back frazzle organization we installed earlier added a niggling extra claiming considering of its extra tubing size.
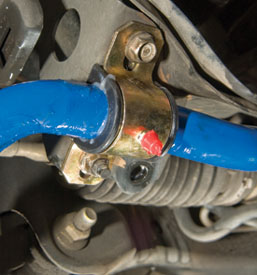
Install the other subclass with the concave side towards the rear, and motion the sway bar bushing strap into alignment with the other holes.
Using the provided bolts, washers and nuts, secure the bushing straps and torque the bolts and nuts to approximately 35 foot/pounds.
Torque the 19-millimeter sub-frame bolts to approximately 100 pes/pounds in one case the other brackets are aligned and tightened.

Reinstall the rear endlinks, noting that the hole closest to the tip is the softer setting (195 percent stiffer than the factory bar) and the other is the stiffer setting (215 percent stiffer). Cobb recommends the softer setting for nigh conditions.
Moving to the front of the vehicle, the outset angle of attack is to remove the sub-frame brace by removing the ten 14-millimeter bolts. Use a box wrench to prevent the 2 nuts above the sub-frame from spinning on the front of the brace.
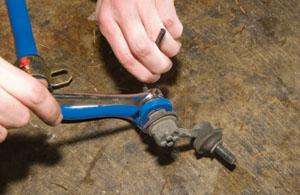
The front endlinks require a 14-millimeter wrench and a 5mm allen wrench for removal. The stud, which the 14mm nut is around, has an allen hole on the end to prevent it from gratuitous-spinning during removal.

Remove the mill bushing straps. Be conscientious to support the sway bar to prevent it from falling, and note it's orientation beneath the necktie-rod ends.
Using the wrench and allen combination over again, install the endlinks to the Cobb sway bar. Grease and arrange the bushings and straps on the new bar.
Reusing the mill bolt and nut, install the sway bar, ensuring that it's rotated correctly and non installed upside down (the arches go under the steering tie-rod ends).
Reinstall the front end endlinks. Torque to approximately 40 foot/pounds, and for extra insurance that the nuts will non loosen, apply Loctite to the stud threads before tightening.
Replace the sub-frame brace. Reinstall the bolts loosely, then torque them to about 55 foot/pounds once they are all threaded.
For more than stride-by-step stories on auto repair and comeback, visit Extreme How-To online at www.extremehowto.com. You lot'll observe articles on replacing ball joints, replacing brake shoes, repairing a radiator, installing a interruption organization and much, much more than.

How To Set Up A Sway Bar,
Source: https://extremehowto.com/everything-auto-anti-sway-bar-install/
Posted by: shortfarsitrand00.blogspot.com
0 Response to "How To Set Up A Sway Bar"
Post a Comment